Revealing Clues with a Rack Focus in an Interactive Film Game: Design “Seeing an Object” and “Seeing Its Details Clearly” Separately
A clasp appearing on screen does not mean its break has been revealed. Use a rack-focus disclosure card to review the object's presence, the legibility of its details, and the conclusions those details support separately. Let the shot establish the damage; leave responsibility to later evidence.
Introduction
When designing a rack focus that reveals a clue, first specify the one fact viewers should be able to confirm by its end, then decide how the focus will move. The target in this example is “the clasp at the edge of the table is damaged.” The opening image establishes its location; the final image reveals the break. Neither alone can prove who damaged it. When handing work between cinematography and storyboarding, provide a rack-focus disclosure card that records both the conditions for visibility and the limits of the conclusions supported. “Shift focus to the clasp” is not enough.
What follows is a complete fictional teaching example, not a real user case, measured result, hands-on test, or DramaFork product feature. The scene, shots, and subsequent choices are all teaching scenarios and do not involve any particular production engine.
1. Separate “It Was on Screen” into Three Information Levels
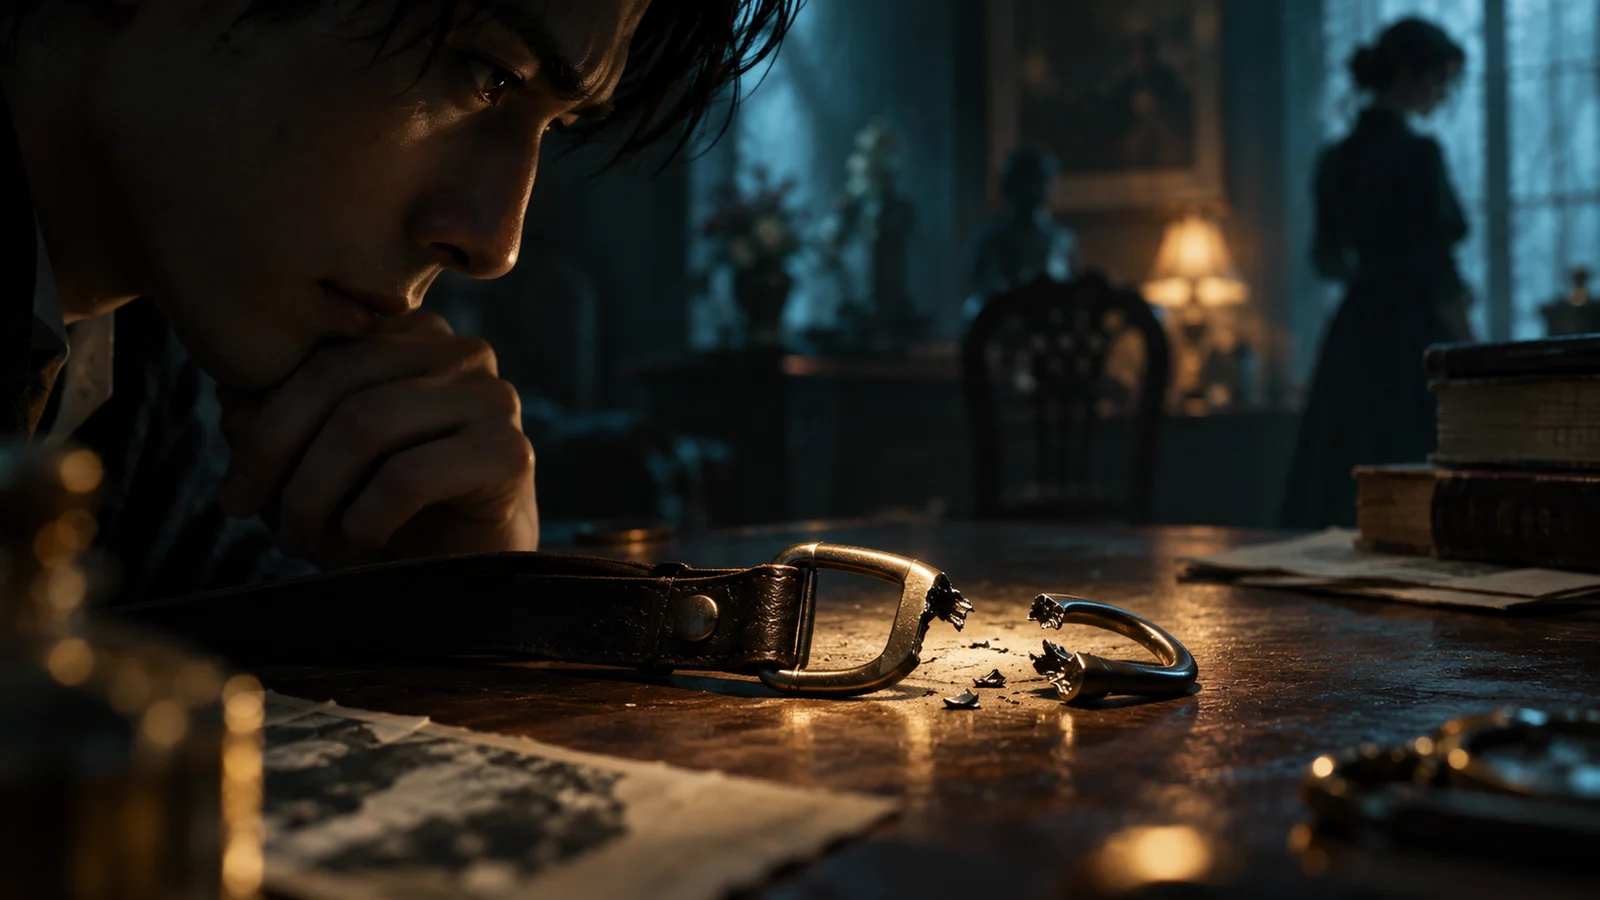
The first level is the object's presence. In the opening image, an adult character's face is sharp in profile, while a clasp at the table's edge is out of focus. If viewers can distinguish only a metallic glint, the image establishes, at most, “there is a metal object at the edge of the table.” It does not yet establish that the object is a clasp. To communicate its identity, preserve a recognizable overall outline or use an earlier shot to establish the correspondence between the object and its location. Do not let the prop name known to the writer do the viewer's work of identification.
The second level is detail legibility. Once the rack focus ends, viewers should be able to distinguish the break from an intact edge and see where the material is interrupted, rather than simply notice that the clasp has become brighter. If a finger covers the break, it falls into shadow, or it overlaps a bright line in the background, the information “damaged” has not been conveyed, even if the object itself is sharp.
The third level is supported inference. In this example, the prop is a closed clasp that should form a continuous loop. The image needs to show both the break and an adjacent intact section to support “it is damaged here.” If the shape could also be a normal opening mechanism, provide further visual grounds or weaken the conclusion. When the damage occurred, what caused it, and who is responsible all fall outside what this detail can support on its own.
2. Fill Out the Disclosure Card Before Drawing the Focus Movement
Fill out this card in terms of observable content. Its fields can be copied directly for other clues. Do not set a standard duration in advance: the time needed depends on the target detail, visual distractions, and viewing conditions, not on the fact that the shot is called a rack focus.
| Field | Entry for This Example |
|---|---|
| Disclosure target | Establish that the clasp at the table's edge is damaged, allowing further investigation |
| Starting focus | The character's face in profile; the clasp is at the table's edge, its location can be tracked, and the break is not yet discernible |
| Target detail | The interruption in the clasp's material and the adjacent intact edge; distinguishable from shadows, seams, and a normal opening |
| Occlusion conditions | Hands and sleeves do not pass over the break; the table edge does not hide the gap; highlights do not obscure the outline of the broken surface |
| Focus movement | Move from the face to the clasp without switching objects along the way or introducing other sharp clues |
| Final image | The face softens; the break and its relationship to the surrounding form are discernible together, with an uninterrupted view held long enough for recognition |
| Supported conclusion | This clasp is damaged; the cause needs to be investigated |
| Unsupported inferences | Who damaged it, when it happened, whether it was intentional, and what tool was used |
| If the shot falls short | Adjust camera position, lighting, prop orientation, or composition; add a detail shot if the break remains indiscernible |
Share the “unsupported inferences” field with the editor and writer as well. Otherwise, the cinematography may reveal only a break while the next choice reads “Expose how the person in front of you damaged the clasp.” The narrative would still be exceeding the shot's informational limits.
3. Put the Design into Three Storyboard Panels: Start, Transition, End
The starting panel establishes spatial relationships: the character is in the foreground, the clasp is at the table's edge, and the character's hand has already moved away from the prop. Choosing not to have the character touch the clasp avoids adding the fact that “the character is handling the object.” Being near it establishes only proximity, not responsibility.
In the transition panel, focus leaves the profile and gradually settles at the location of the break. Mark which part becomes sharp first so that focus does not settle on an intact edge while the actual gap remains blurred. If a narrow beam of light sweeps across the metal, treat it only as lighting that helps define the outline. A fleeting highlight cannot, on its own, make the break clear.
The ending panel keeps both sides of the gap and part of the intact outline in frame. An extreme close-up of the broken metal surface may be more striking, but it can lose the connection “this is the same clasp we saw earlier.” Including more of the tabletop, however, may make the break too small. This example prioritizes the connection between the object's identity and the location of the damage, adjusting the composition as needed rather than simply increasing the blur.
Compare a failed version: the clasp as a whole comes into focus, but the break faces the tabletop, leaving viewers able to see only a bright edge. The shot displays the object without revealing the damage. The revised version turns the break toward the viewer, removes obstructions, and retains the adjacent intact section. The revision changes the visibility of the evidence; it does not upgrade “damaged” to “someone deliberately damaged it.”
4. Keep Subsequent Choices Within the Evidence
Choices following this shot could be “Examine the break” or “Ask where the clasp came from.” Both acknowledge that the damage is all that is currently known. Offering “Identify the person who damaged it” requires independent grounds established before or after this shot, along with a separate account of how far those grounds support the conclusion. The emphasis created by a rack focus cannot fill gaps in a causal chain.
Review sound and editing together, too. Cutting to a close-up of the character's alarmed face just as the clasp becomes sharp, or adding “So it was you,” gives the otherwise limited physical evidence an accusatory direction. This example retains ambient sound and ends on the clasp, leaving investigation to the next step. It sacrifices a strong emotional beat, but makes the disclosure target easier to check.
If the creative intention calls for viewers to become suspicious, a suggestive transition can remain. In the disclosure card, however, distinguish “facts confirmed by the image” from “suspicion encouraged by the narrative.” Suspicion can motivate action, but should not quietly become a confirmed fact later on.
5. Review Under Viewing Conditions, Not from the Writer's Memory
First check the static conditions of the final image: can the object be connected to its starting location, is the break discernible, and are there obstructions or easily confused seams? Passing this static check establishes only that the frame contains the information. It does not prove that normal playback gives viewers an opportunity to recognize it.
Next, watch the sequence continuously at the intended delivery aspect ratio and display size. Check where the focus lands, the stable portion of the shot, and the point at which it cuts away. If finding the break requires pausing or zooming in, mark the current version as insufficient disclosure, then adjust the image or the time it is held. If subtitles or choices compete for attention, rearrange the sequence in which information appears. Simply extending a shot while those distractions still interfere with recognition is not enough.
Finally, ask someone who was not involved in the storyboarding to describe “what you saw” and “what you can confirm from it.” If they say only “there was a clasp,” revisit the detail conditions. If they say “the person in front of us broke it,” ask which part of the footage supports that conclusion and check for unsupported implications. This is a proposed review method, not a claim that it has already been carried out or passed.
The card applies to localized physical evidence that must be communicated through visible form. Appearance alone cannot establish material properties, the tool used to cause damage, or responsibility, nor can the card guarantee that every viewer will notice the clue. At handoff, label “image conditions checked” and “viewer recognition awaiting confirmation” separately so the next person in production knows exactly what this rack focus has conveyed.